
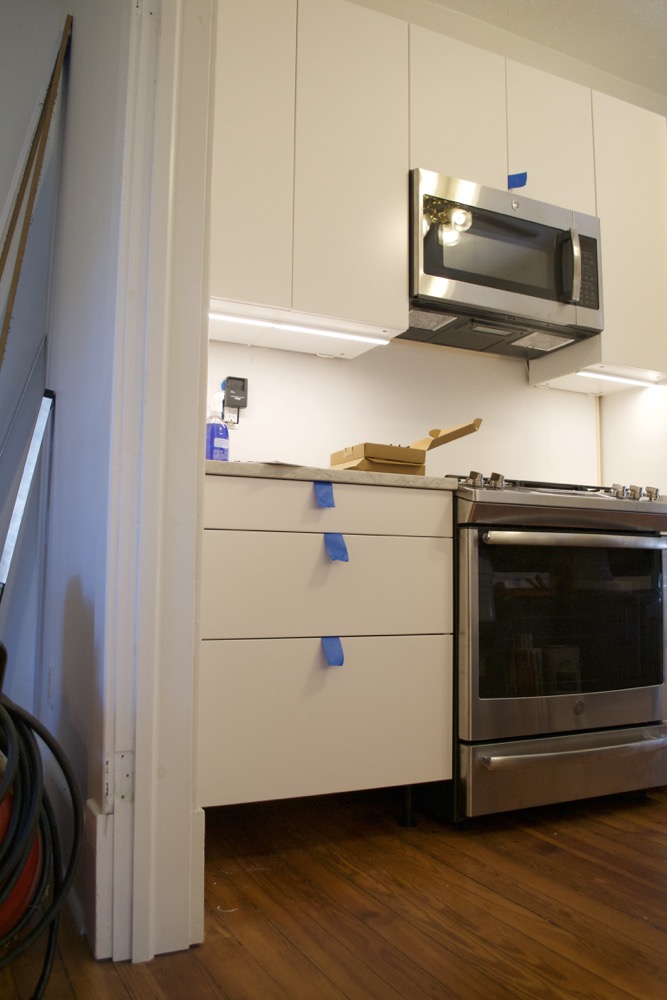
We’re currently knee deep in the kitchen renovation and things are really starting to come together. We’re working on a lot of the little finishing touches, and we’ve had some issues with the tile that we’re trying to solve now. So, I’m not really sure when we’ll be totally finished.
The latest project we worked on was our under cabinet lighting (for the upper cabinets). For some reason we both thought this was going to be a piece of cake. The instructions and all of the parts seemed very simple, but we still encountered some issues that could have been easily avoided knowing what we do now that they’ve all been installed. So, below are my tips for installing Ikea under cabinet lighting.
Tips for Installing Ikea Under Cabinet Lighting
- In the instructions they have you thread the cord of each under cabinet light behind the cabinet and run it up to the top so you don’t see them. However, Ikea uses a rail system for all their cabinets, which makes this impossible. You mount a steel rail on the wall and then hang all of the cabinets from the rail. So, you can’t actually get the cord past the rail to the top of the cabinet. To solve this we ran as many cords as we reasonably could through one cabinet and then drilled a small hole in the top and fed the cords through there. We grouped as many as we could so we could drill as few holes as possible.
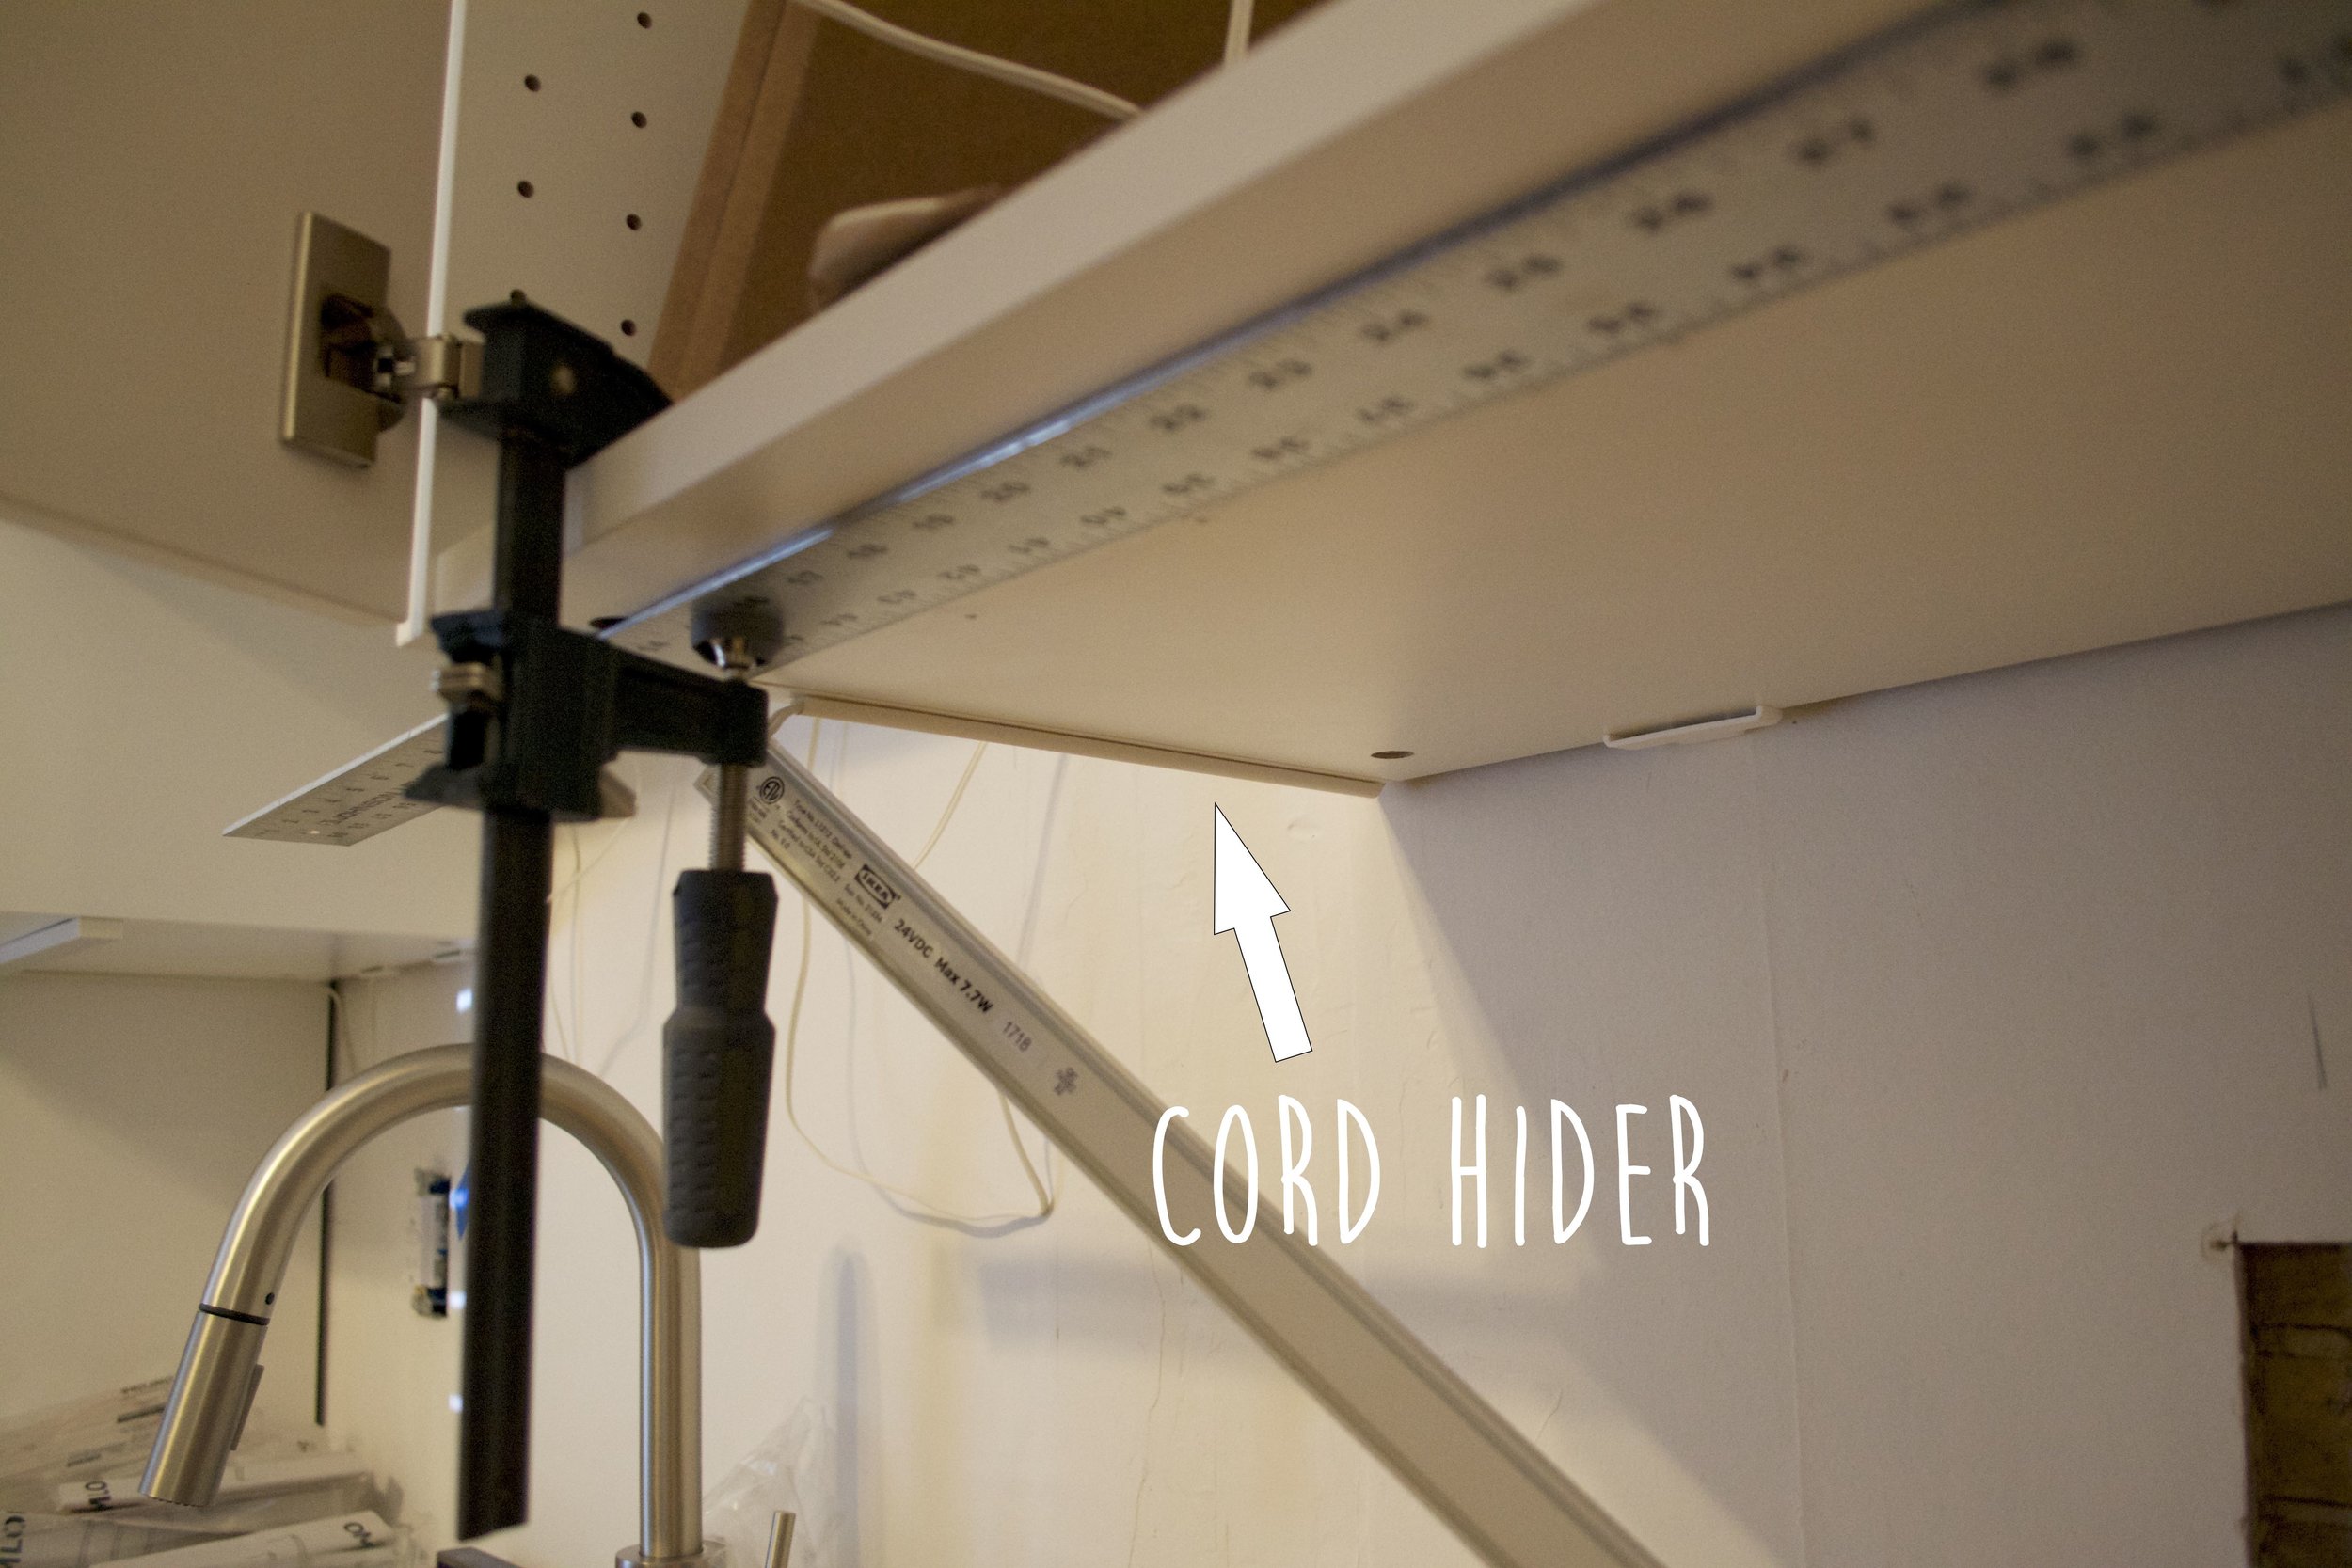
- Also related to the cord are some nuances when it comes to the piece that hides the cord. This is my NUMBER ONE tip for installing these under cabinet lights. It’s so easy, but so helpful! Ikea instructs you so mount the sticky piece first, put up the light, and then snap the top onto the sticky piece over the cord. Well let me just tell you – that cord hider is NOT easy to clip together. And it’s even harder when you’re twisted over the counter to see the bottom of your upper cabinets. I found it to be so much easier to snap that piece together before installing the under cabinet light. Once the light was up I could move the cord hider along the cord as necessary and then stick it in place. Just be sure you leave enough room when you screw the mounting bracket in place for the full length of the cord hider.
- We measured out a piece of wood to the correct dimensions and then used that as a template to mark where the lights needed to go. That way we didn’t have to measure each cabinet. I’m telling you, it’s really no fun trying to see the bottom of your upper cabinets. Ikea includes a dimension for placement on their instructions. However, after some research we determined that it’s arbitrary so we used the length of the cord hider as the dimension for how far from the back of the cabinet we mounted the light. And now that the lights are installed I’m so happy we didn’t spend a bunch of time measuring the exact dimension Ikea called for. They look great and I’m positive a couple inches wouldn’t have made any difference.
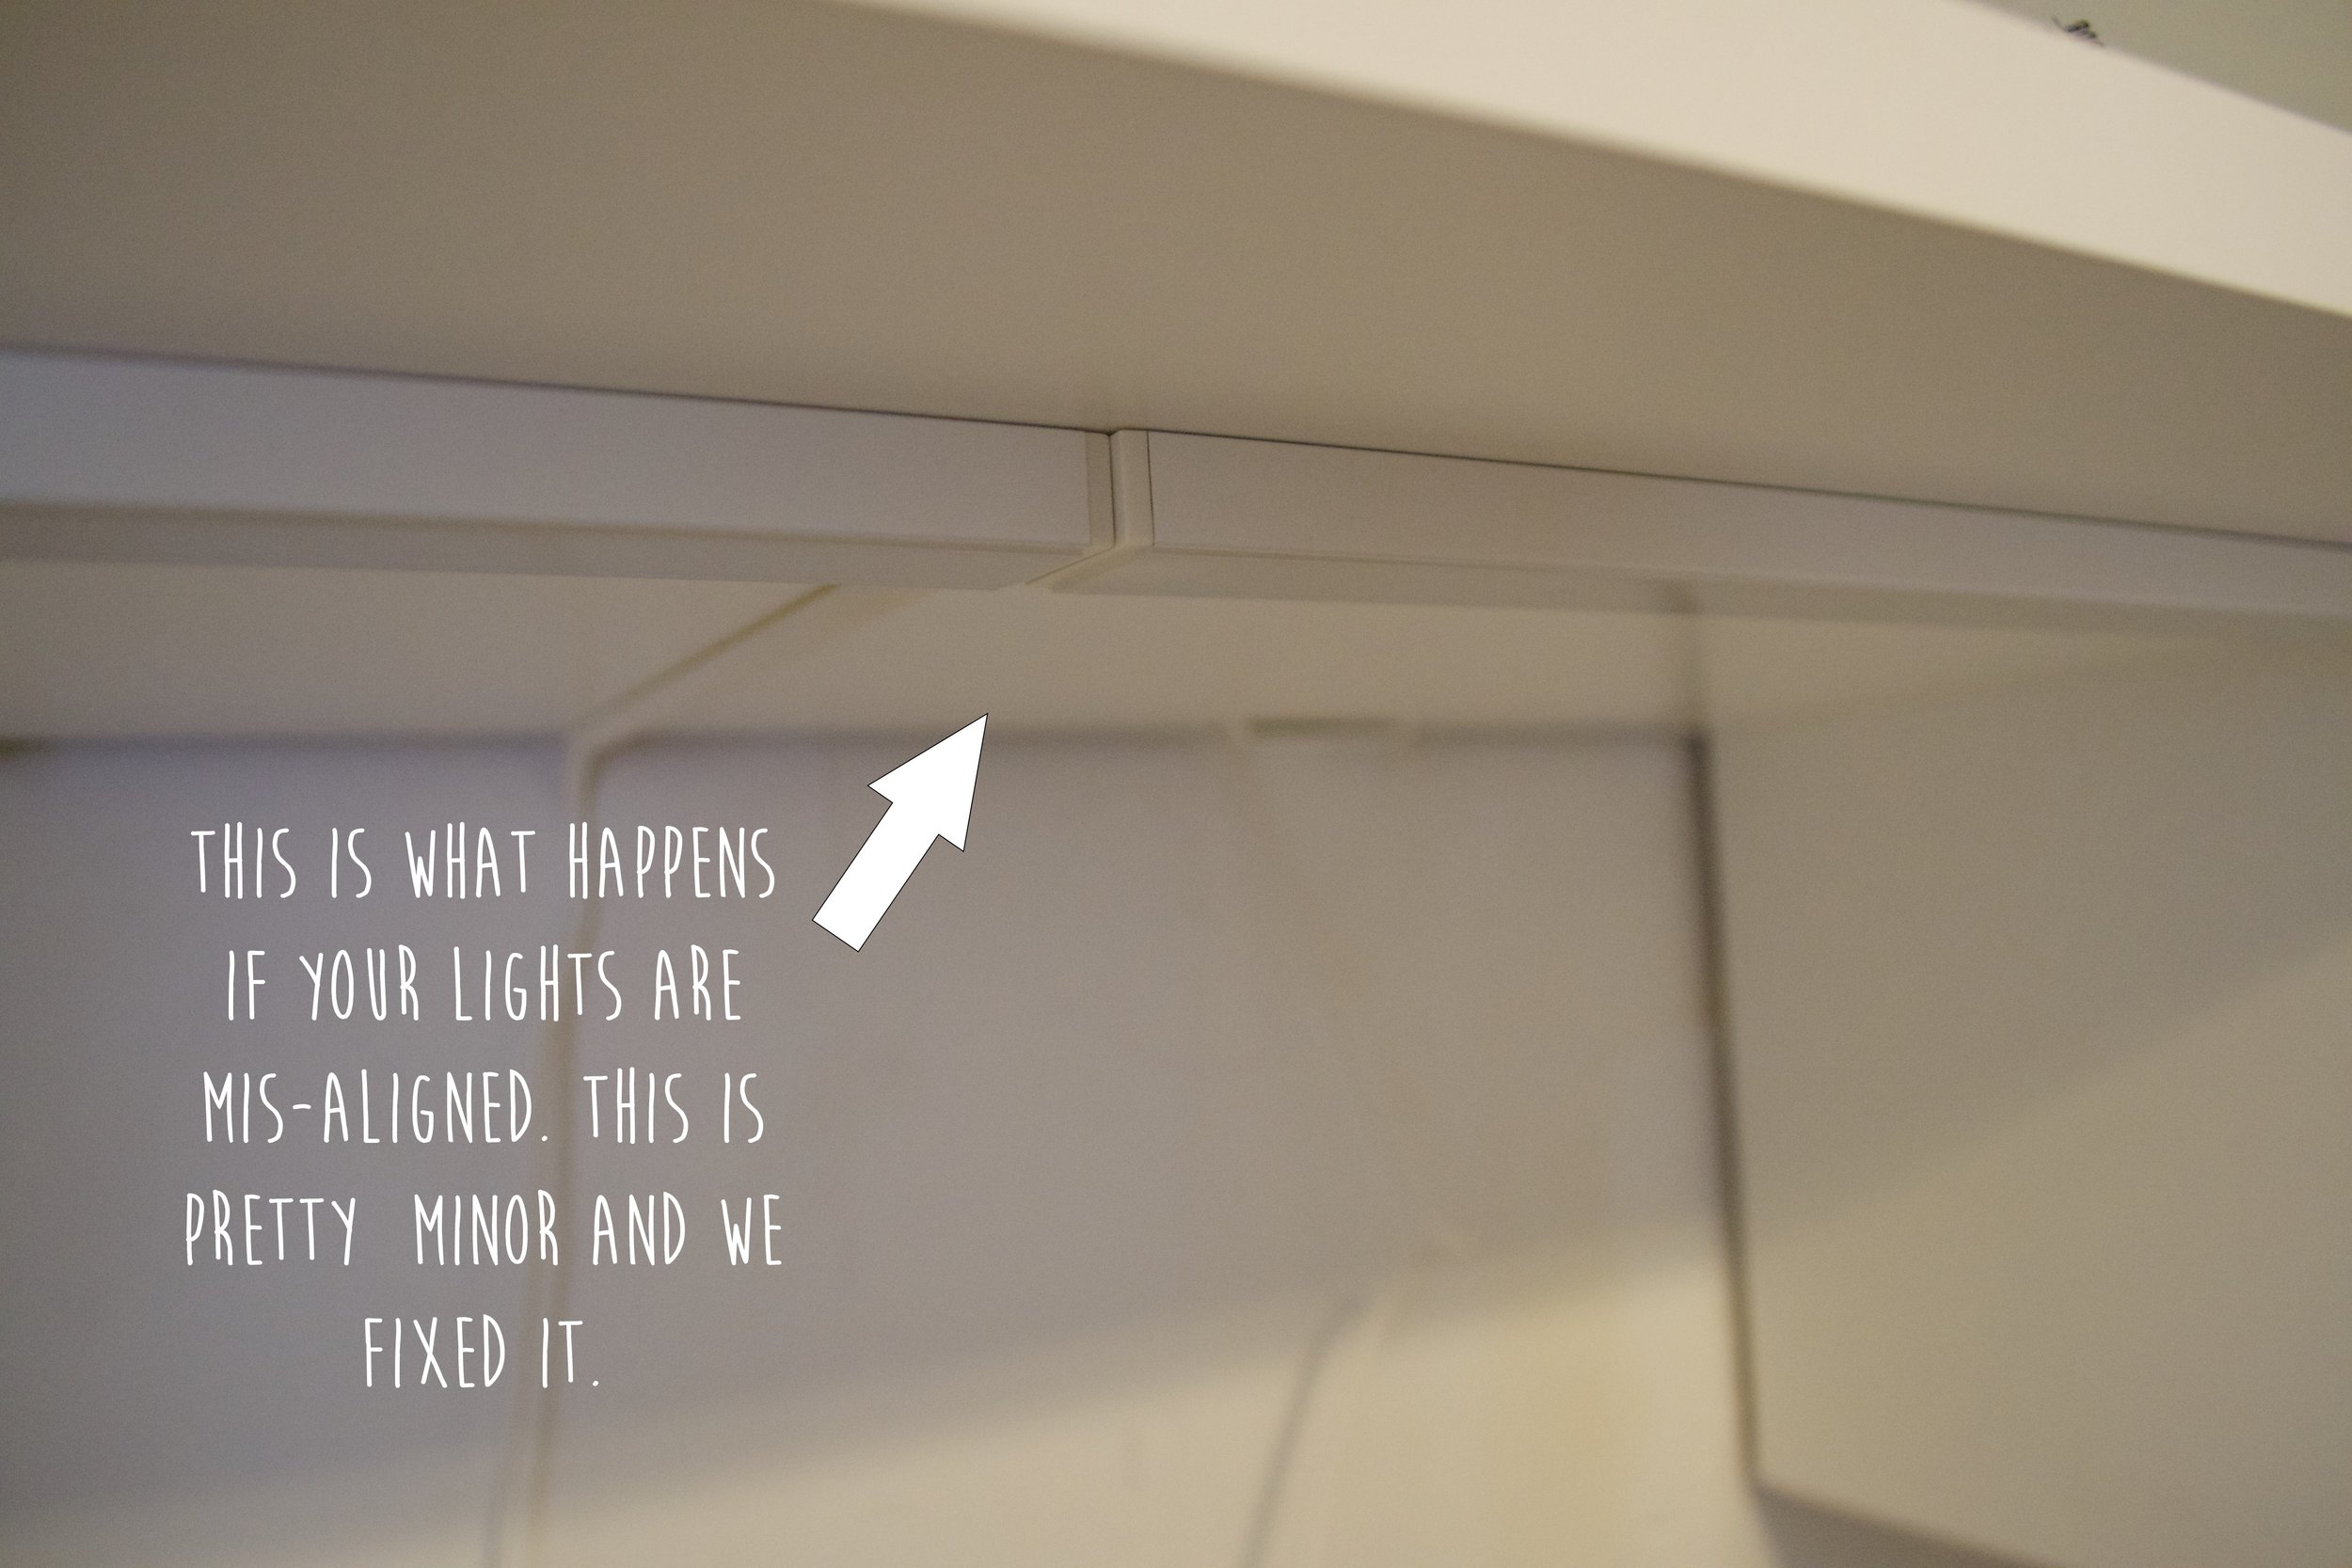
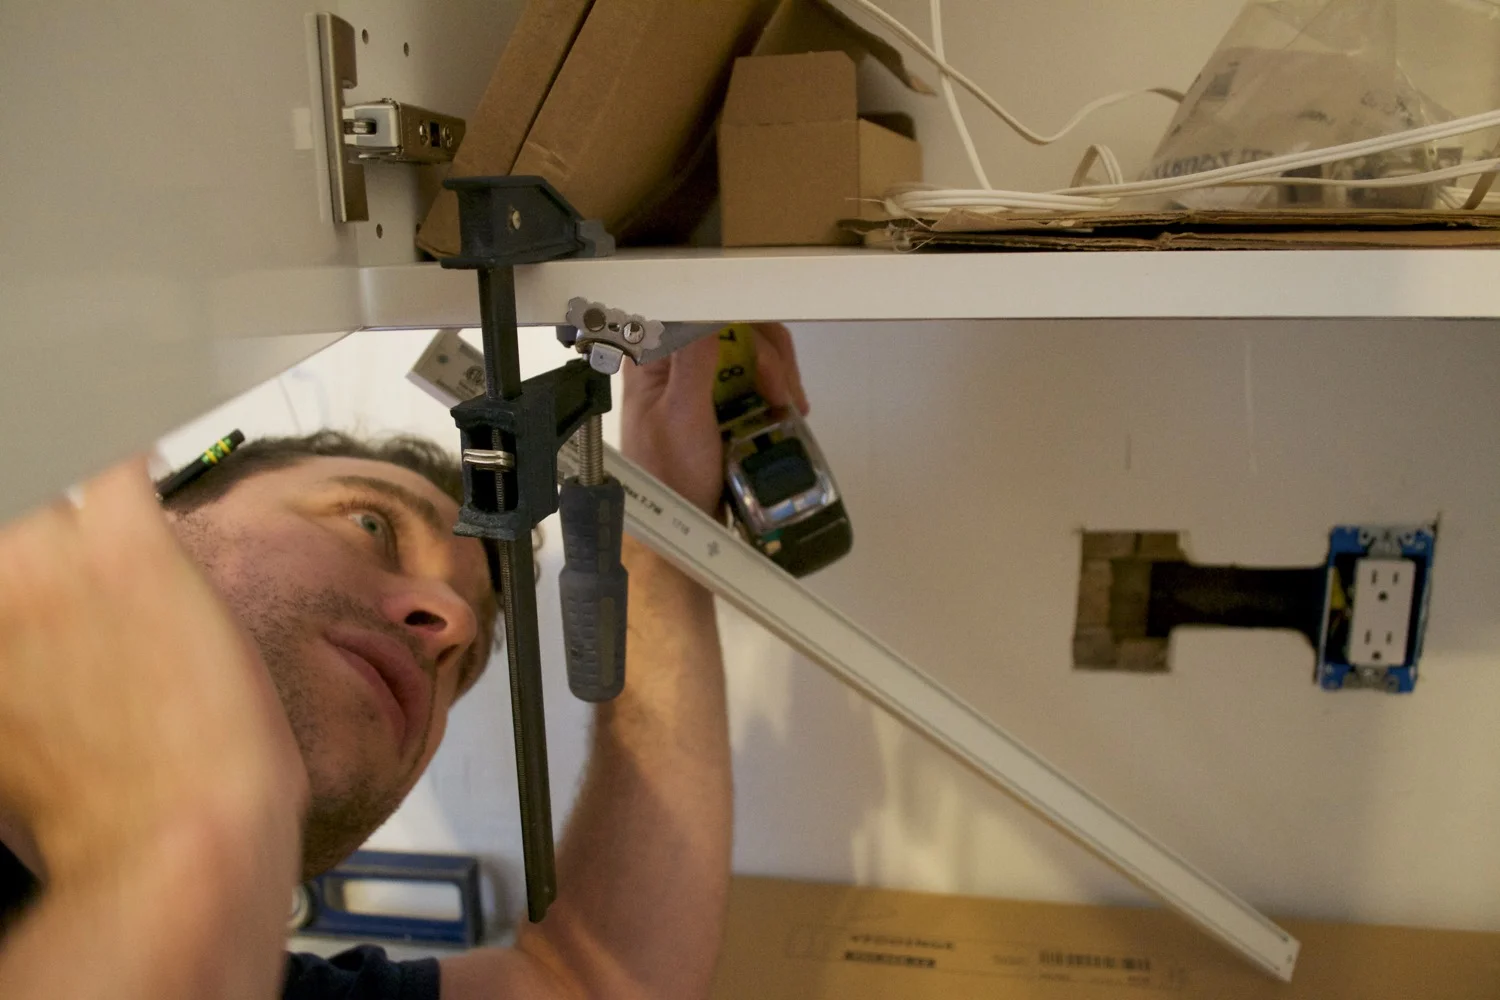
- When your cabinet is 24” or wider you have to use two lights mounted right next to each other to fill the space. We ran into trouble trying to get those lights to line up perfectly. If they’re off even a tiny bit you can really tell. We solved this (after several re-tries 🙃) by using a long ruler to draw a straight line across the entire width of both the cabinets. Just measure how far back you want the lights to be, make a little mark on each end, and then connect those two marks with the ruler. We found it to be much easier by clamping a long ruler to the cabinets to securely hold it in place. It’s surprisingly hard for one person to hold it in the correct position long enough for the other person to draw the line. And any little movements can mean you’re lights out of line with each other. This trick will ensure your line is straight and save you A LOT of trouble.
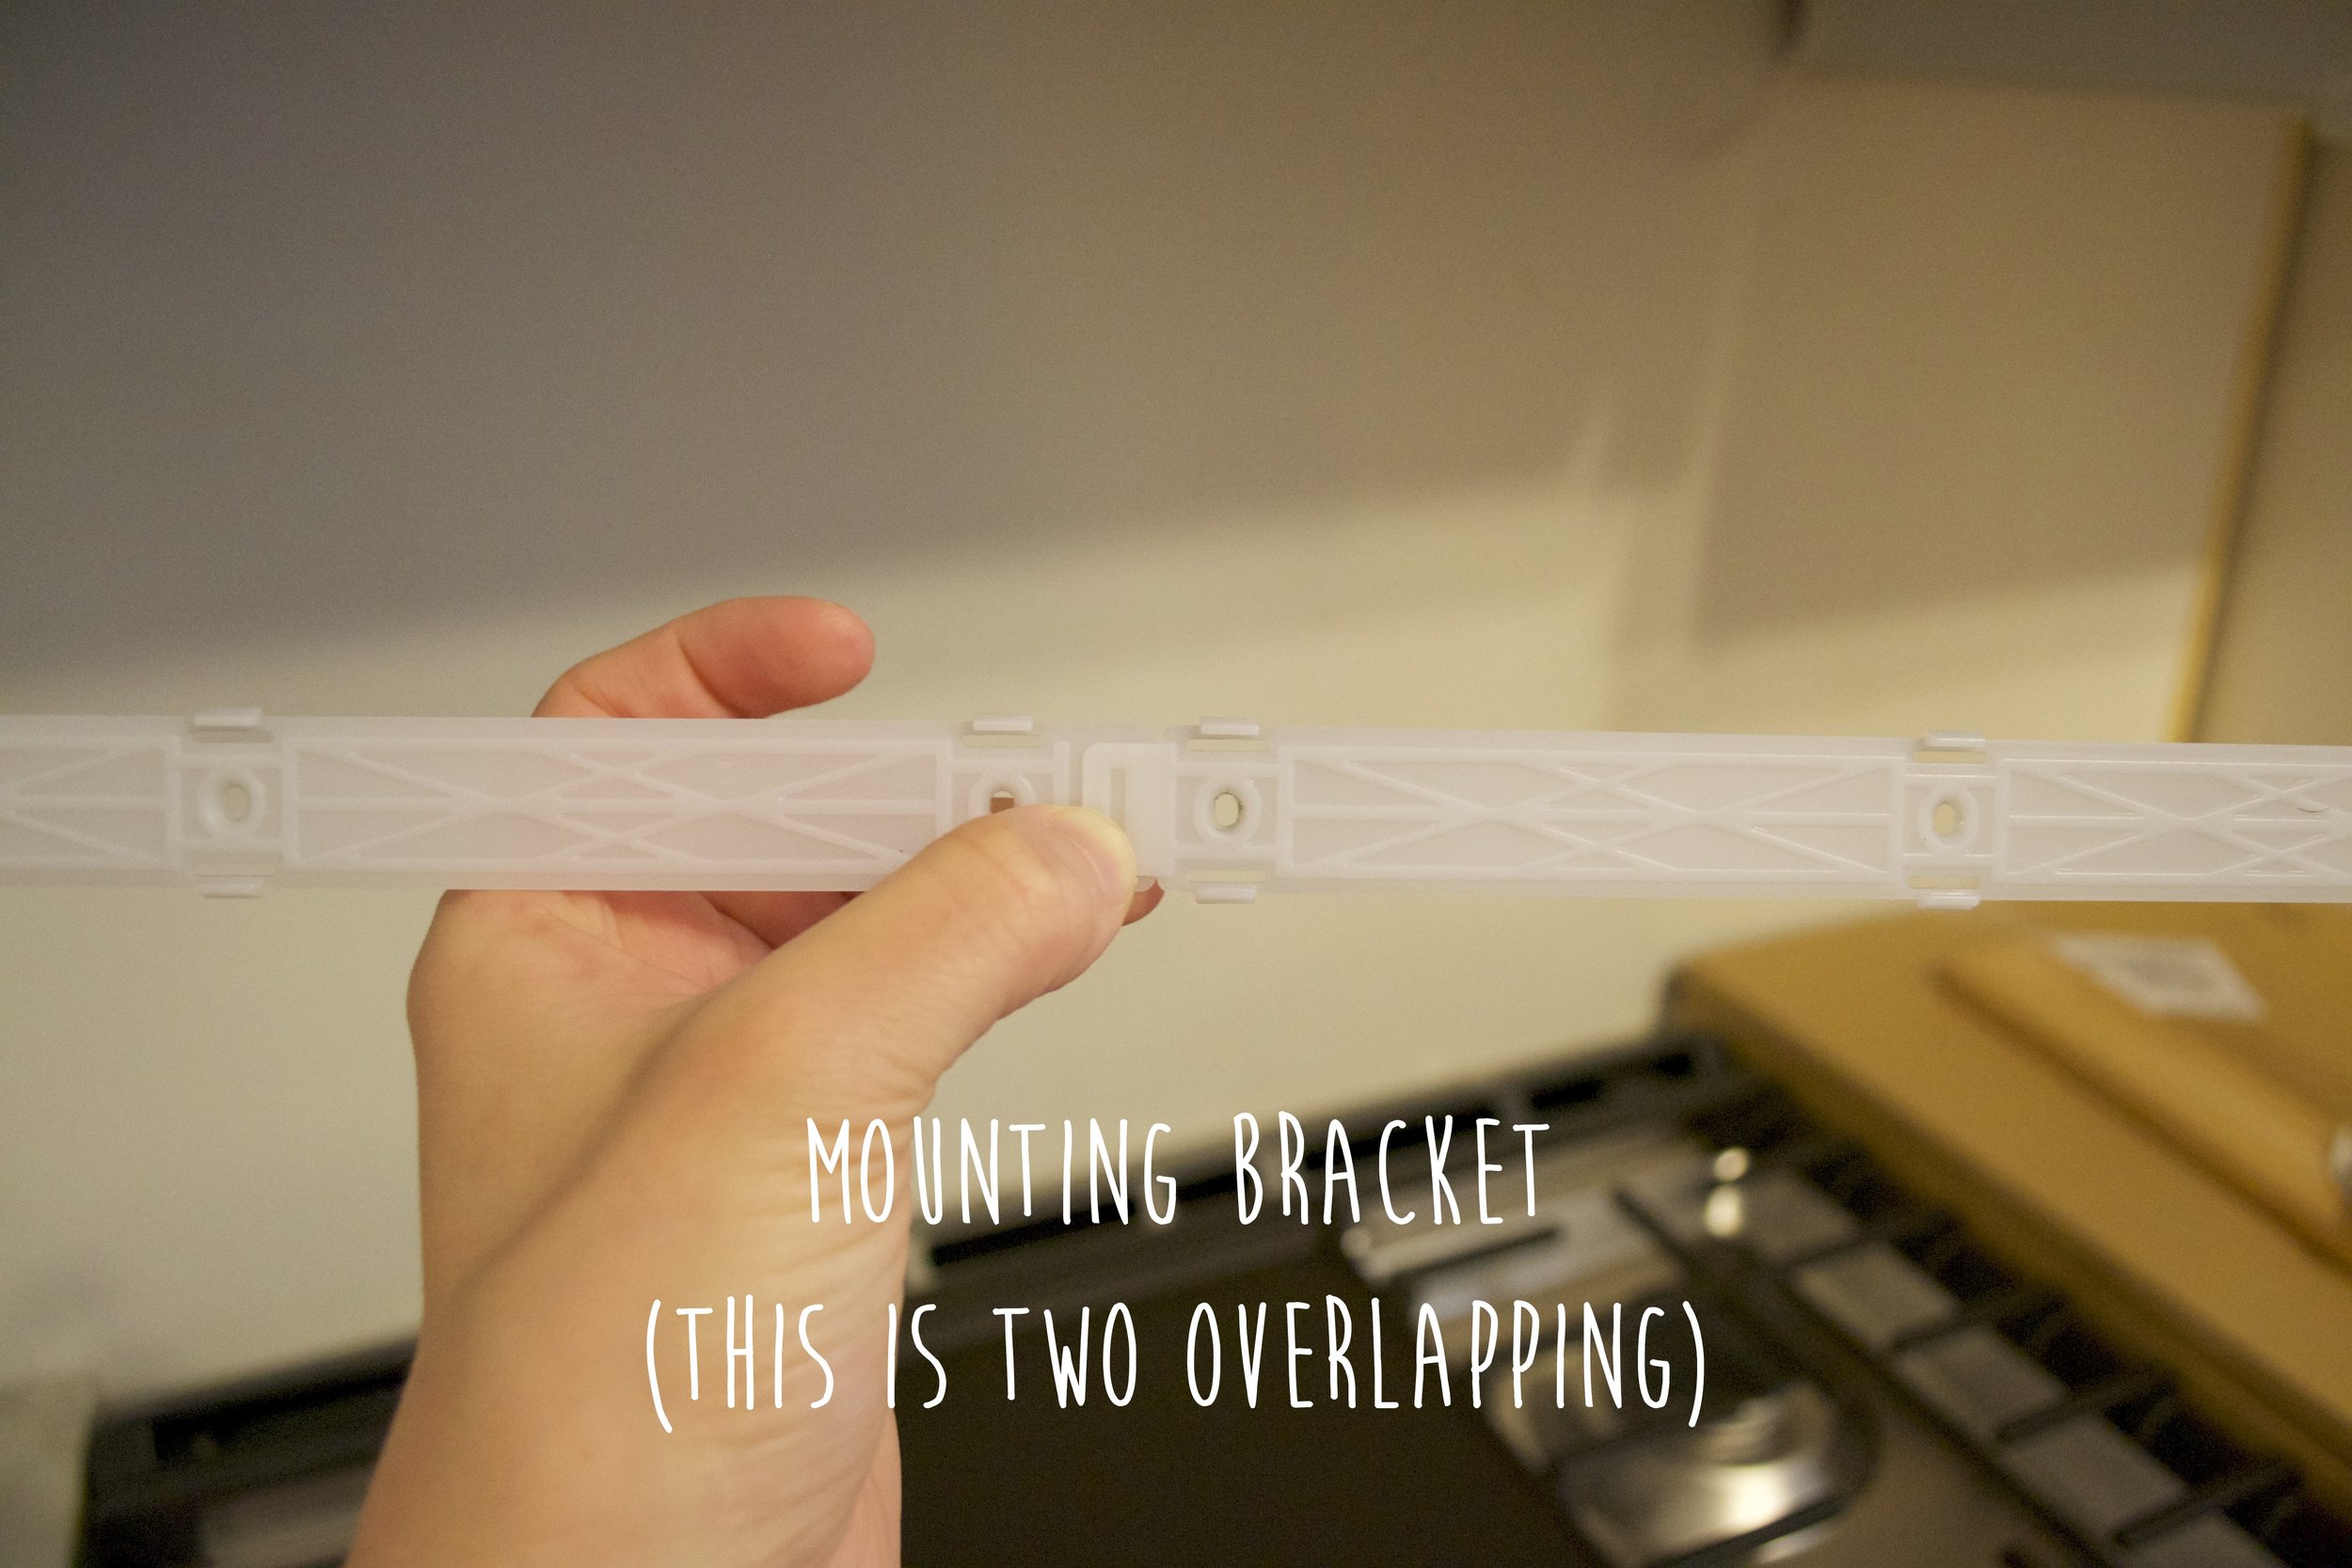
- The lights slide along the mounting brackets. So, I found it handy to mount those pieces wherever it would make it easiest to get a straight line. In the case of multiple lights I installed the white pieces just a couple inches a part and then slid the light all the way to the other side. The lights take up the entire span of the cabinet so you’ll never know that the mounting piece isn’t centered. This is another way to help ensure your lights meet evenly.
- Once you clip the light into place you CAN take it off. It will feel like you shouldn’t and that you’re going to break it, but it’s fine. We did it many times, but were really nervous the first time and held off longer than we needed to before we took one off for the first time. But, don’t worry it’s totally fine.
- The ultimate tip I have is one that might be a little hard to convince you of. It’s to install the mounting brackets before you put your cabinet boxes up on the wall. I know, I know, it seems like you could never know where exactly to put them. And, personally, I could not have even thought about another thing at the time. But, I swear it’s worth it! Once a cabinet box is built just flip it over, and follow the directions and use the tips I outlined above. If you do it this way you don’t have to try and do it at an awkward angle below your upper cabinet. And, if you do it this way you can thread the cords behind the cabinet without drilling any holes. Because the cord actually fits (it’s the plug that connects to the transformer that’s the problem). I totally get this is one of those “I’ll believe it when I see it” things. So if you can’t take the leap of faith quite yet, then using the other tips I outlined will still make the process so much easier!

You Might Also Enjoy


Wow, it’s been such a long time since I’ve been here - almost been a year since I was last posting regularly. A lot has happened in that time, and while I’ve really wanted to keep up with the blog, it just hasn’t happened. Between doing the entire kitchen renovation ourselves, starting a new job, some international travel, a death in my family and Xan’s, and some mental health changes, I just haven’t been able to get to it.